|
markboyd.info S2 6.8 "Exciter" Sailboat Pages |
|
Two most important questions in life. markboyd.info News Page Looking for something? Check the Site Map Help children know about Jesus. |
Get The Engine RunningAug 13, 2009I started working on the engine this evening. I pulled the plugs out and saw that the are ring fire plugs and fairly heavily fouled. So I cleaned them with soap and water and then cleaned the insulator between the electrode and thread base with carb cleaner. Below is what they look like now that they are clean.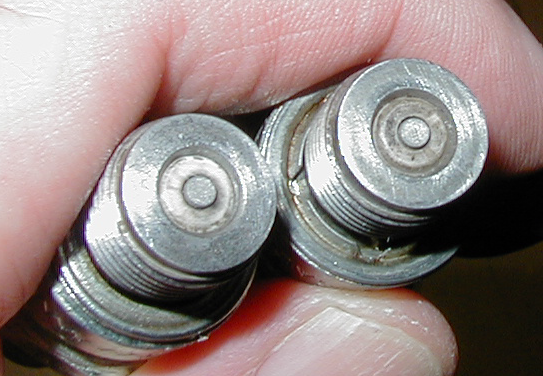
They still are not ideal in my estimation. I put one at a time into a plug wire and turned the engine over manually. Usually this will result in a spark if everything is OK. I got no spark with either plug in either plug wire. { I don't like these surface gap plugs in a two cycle application. It seems to me that they can foul too easily. However they are the plug specified by Johnson. I will try another plug just to make sure the problem is not the plugs.} I then checked the neutral lock out switch. It is open when in gear, and closed when in neutral. That seems counter to what I'd expect, but I imagine that it is right. I have a wiring diagram, but I don't have a schematic diagram. That would show if the switch is normally open or normally closed. Looking at the wiring diagram though, I think the neutral lockout only applies to running the starter motor. I need to check the kill switch to make sure its open I think. August 14, 2009There is not even a tickle of electric coming out of the coils. I put a screwdriver in the plug wire and spun the engine with my fingers between the screwdriver and the block. Not even a tickle from either coil. This is not like the coil. It could be something simple like a bad ground but I need a schematic to check it out, or even better a diagnostic guide. I've go to find a shop manual!August 15, 2009
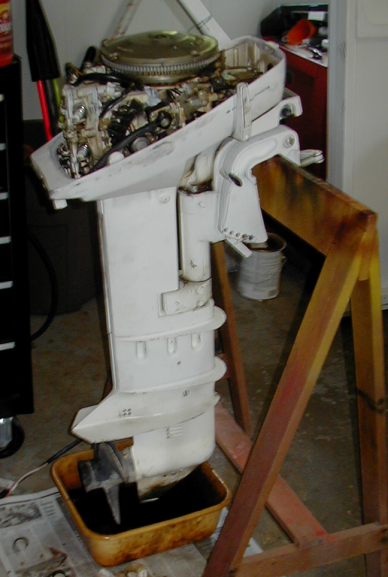
With that, I was able to check out the exciter coil and the timing sensor and they both check OK. That just leaves the CD Ignition Pack, and the spark coils. I haven't checked the spark coils, but I think its highly unlikely they would both be bad, an that its far more likely that the ignition pack would be bad. Fortunately there are three different companies that make replacements. Unfortunately, they are about $60. I guess I'll go ahead and get one ordered (check the spark coils tomorrow just to be sure, before I order). August 16, 2009I checked the coils - .2 on the 200k ohm scale on the secondary side to groud, and 1.0 on the 200 ohm scale on the primary side to ground. Both the same. They are fine. I just need to get a new CD2 inginition control unit. I ordered a Mallory unit from iBoats.com. $62 delivered.I took the coils off the engine and the CD2 ignition module. I'm thinking I'm going to try to wash some of the dirt and grease out of the engine compartment while I have these out.
I also notice that the choke slide was out of place. I corrected that. I'll have to watch when I put it all back together that its right. I washed the cover while I have it off. The cover gasket isn't the best, but its passable. I think I'll save the money right now. I checked the continuity on the battery cables. The positive is fine. The ground is open and it seems to be at just the point that Ray told me it had a break. Kind of weird that the cable would break like that, but it should be easy enough to fix. The cable is really too long any way. August 18, 2009There three things I'm doing with the motor:- Getting the new ignition module so that it will run - Fixing the battery cable to so that the electic start will work -Cleaning the engine compartment Today I'm going to try doing the cleaning. August 19, 2009Yesterday I cleaned the engine with degreaser. I had to be real careful not to get it all over. I primarily wanted to the crud out of the bottom plate.Today, I got the new ignition module and installed it. Now I have a nice bright spark. All I need is the fuel hose and I'm ready to fire it up.
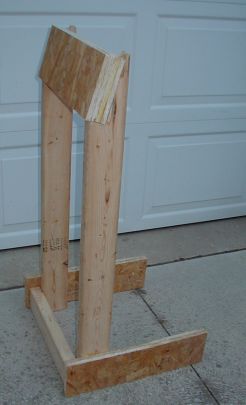
August 27, 2009 I got it started tonight. I got the fuel hose on Monday and finally got a chance to give a try tonight. It started up pretty easily. I had to adjust the mixture to get it to run consistently, but once I did that, I cut the idle speed way back and it idles right along. Shifted into forward and reverse with no problem and had a stream coming from the pee hole (that's what its called), indicating the ater pump was OK, although it didn't seem any have any too much pressure. I may change the water pump over the winter. I got it started tonight. I got the fuel hose on Monday and finally got a chance to give a try tonight. It started up pretty easily. I had to adjust the mixture to get it to run consistently, but once I did that, I cut the idle speed way back and it idles right along. Shifted into forward and reverse with no problem and had a stream coming from the pee hole (that's what its called), indicating the ater pump was OK, although it didn't seem any have any too much pressure. I may change the water pump over the winter.I haven't fixed the battery cables. I just used the rope start to start it. That was no problem. I made a little addition to the engine stand to hold the battery cables. I made it so that the connectors go through the wood so that I can put jumper cables on the connectors when I'm ready to try the electric start and check the charging system. You can see the cable management indicated by the arrow in the photo on the right. May 2, 2010I got a new cover gasket and installed it. The old gasket was held in place with staples. I didn't use anything to hold this one in place. I may eventually put some rubber cement on it to hold it in place, but right now, its good enough - it will keep the water out and hopefully I won't have to have the cover off very often.
|

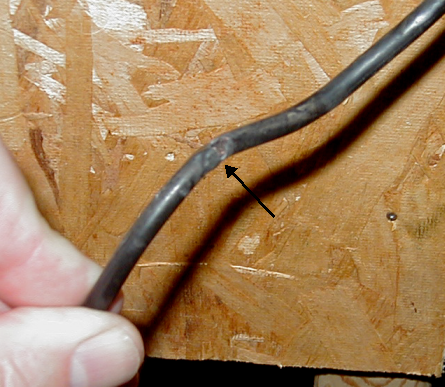
 I was getting ready to put the old ignition module in the box the new one came in and I had a look at it. Look what I found. The wires are smashed from the way it was mounted.
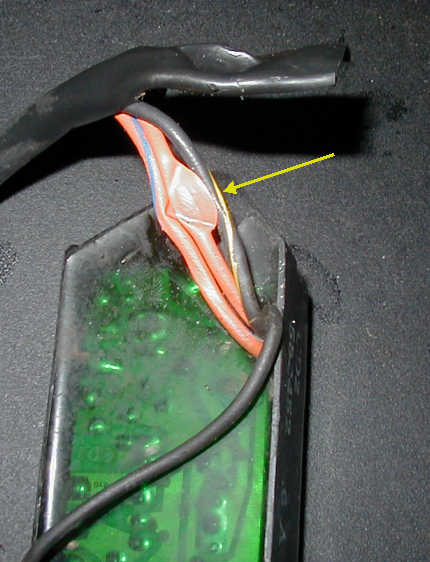
|